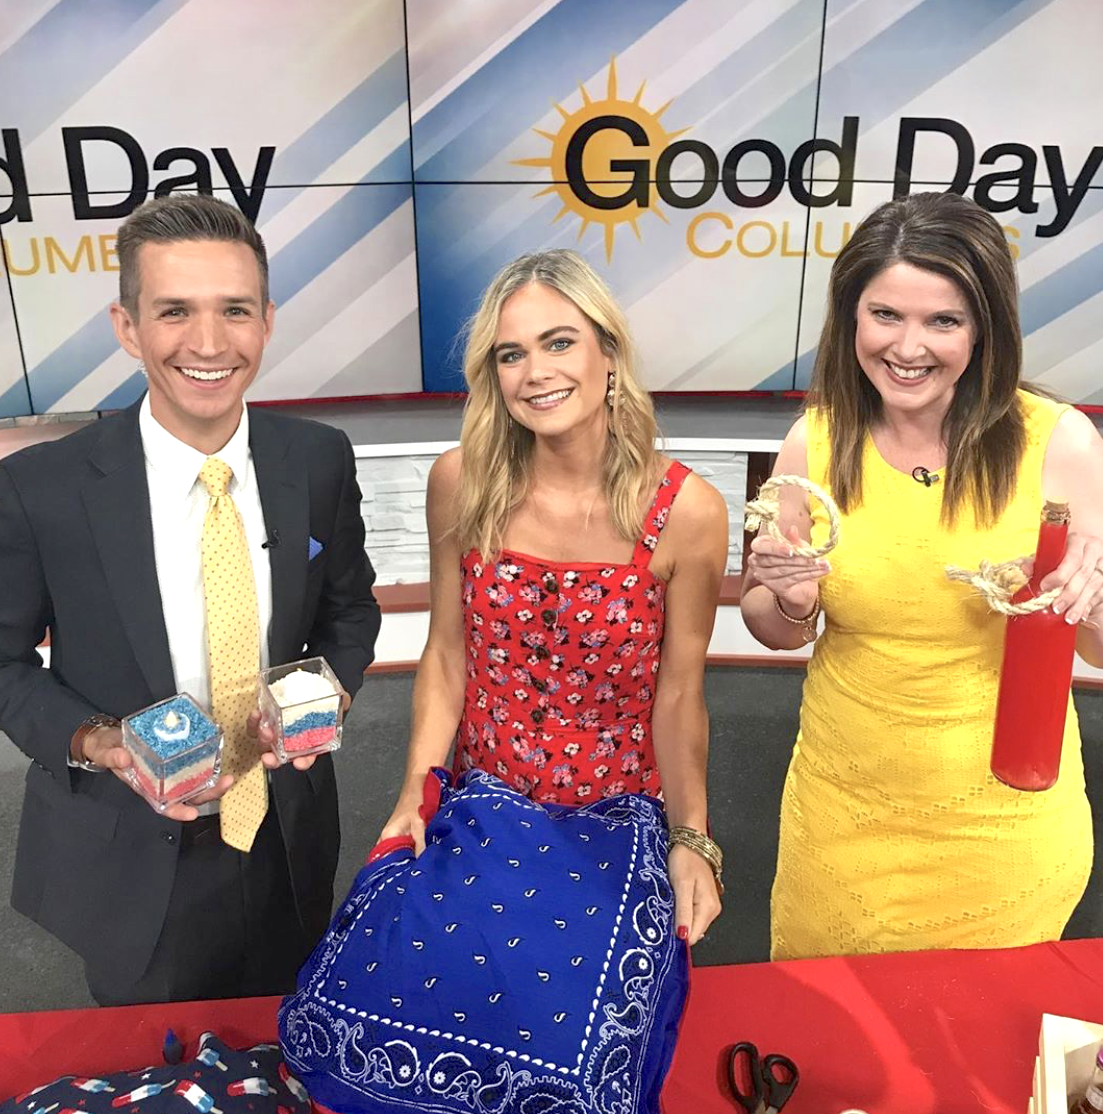
4th of July Themed Crafts with Megan Sharbaugh from Studio 614 on Good Day Columbus { Fox 28 }
Hosting a party this weekend? You’re in luck, because these are the perfect outdoor decorations for your 4th of July picnic on the patio!
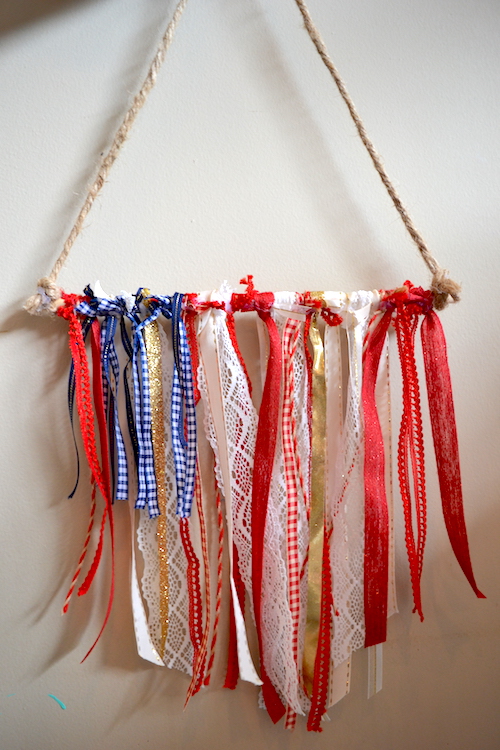
Here’s the step-by-step process for creating the Hanging Ribbon American Flag:
This is for beginners, and the kids can do it, too!
What You’ll Need:
-red, white, and blue colored ribbons of ANY patterns. Mix and match, or use scrap ribbon from past projects.
-1 stick from outside, or a craft stick from Michaels… about 12″ in length is perfect!
-Twine, hemp cord, or more ribbon for hanging the project.
-Scissors
That’s it!
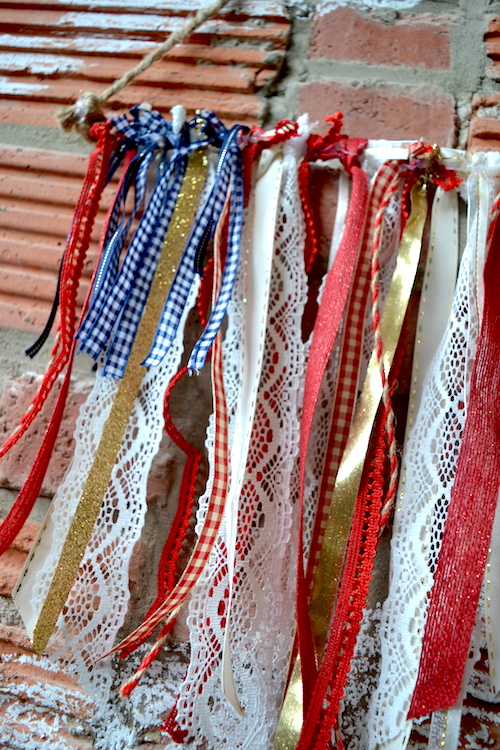
Step 1: The first step is to cut all of your ribbon into about 12″ pieces lengthwise. Cut as many pieces as you’d like, and you can make this flag as “full” as you’d like. More ribbon will just make it look more full.
Step 2: Begin tying each piece of ribbon onto the stick. Double knot each piece so that they stay in place, and try to tie about 5 red pieces side by side, then 5 white pieces side by side, then repeat. This will create that stripe effect.
Step 3: Once your flag is full of red and white stripes, we are ready to add the blue ribbons. Only add to the left side on top of the white and red ribbon knots. This will be the square of stars in the top left corner of the flag.
Step 4: Once you have enough blue ribbons tied on to where it looks as if most of the red and white ribbon on that side is covered, you may cut all of the blue ribbons about halfway up. This will allow the red and white to show through towards the bottom of the flag, and the blue square will be more clearly visible at the top!
Now you see the pattern here!
Step 5: Tie your twine/hemp piece (about 12″ in length) onto each end of the stick in double knots.
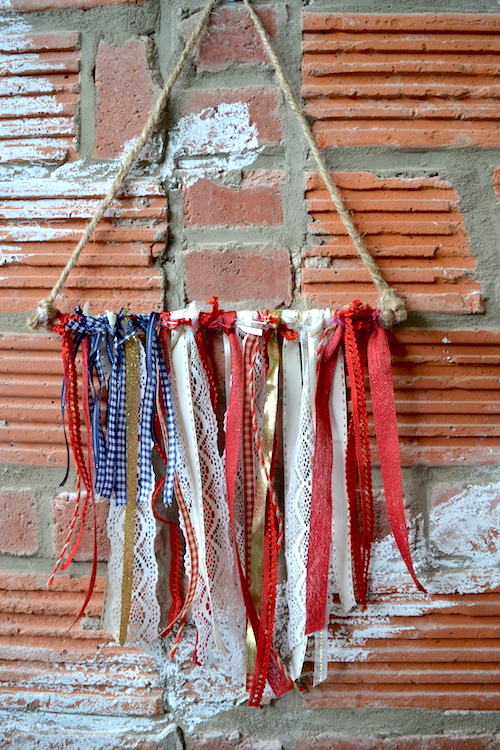
If you wish to make your flag longer towards the center and shorter towards the sides like the one pictured below, you may now cut that shape!
Hang indoors, outdoors, or wherever!
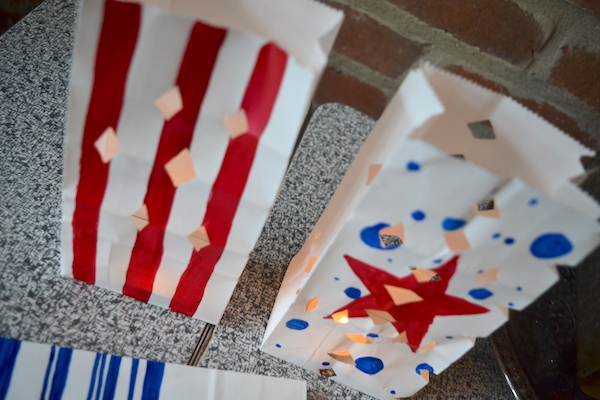
Below you’ll find the step-by-step process for making your outdoor luminarias:
What You’ll Need:
-White or brown paper bags (from the grocery store, party store, or Michaels)
-Paint or markers for decorating
-Scissors
-Tea light candles
-Sand (optional)
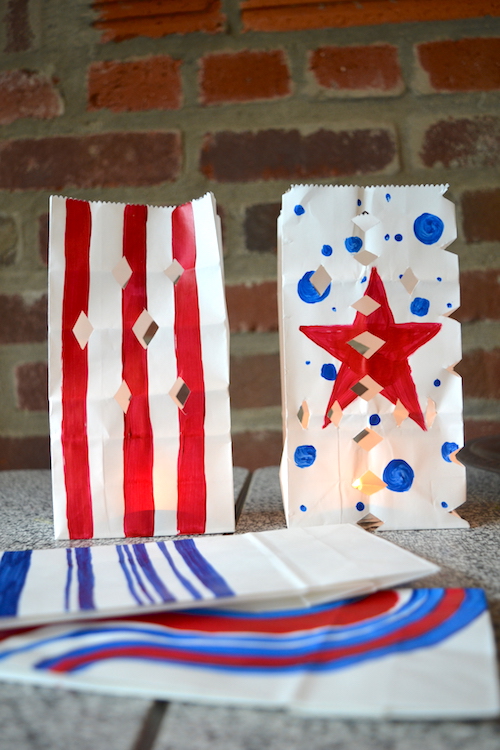
Step 1: Either paint or color the paper bags with red, white, and blue markers so that they are super festive!
Step 2: Allow that to dry completely.
Step 3: Fold each paper bag into the smallest square possible.
Step 4: Cut tiny triangles on each side of the fold. This is similar to making paper snowflakes!
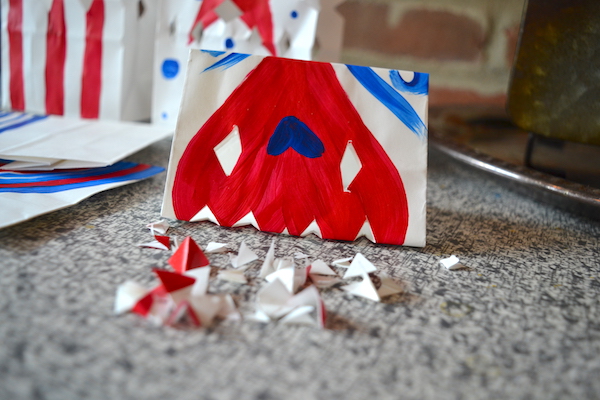
Step 5: Unfold the paper, and see the “hole-y” pattern!
Step 6: Place the optional sand in the bottom (if there aren’t holes at the bottom), and add a tea light candle.
Be sure to keep this out of reach of children and out of the way so that nobody knocks them over since they are flammable bags. 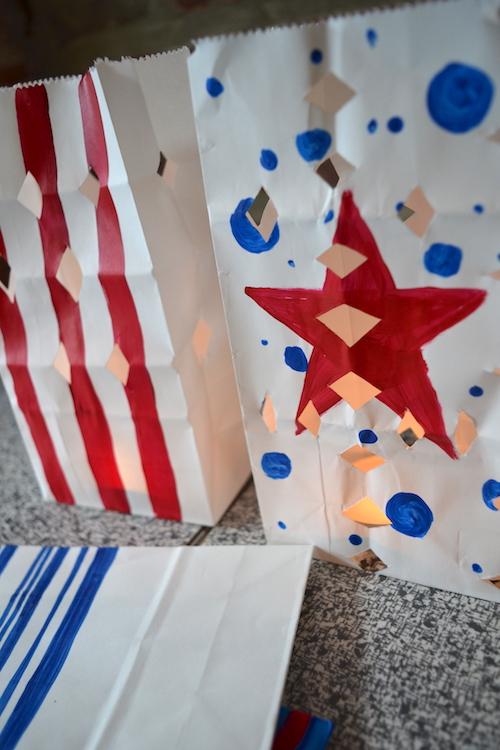
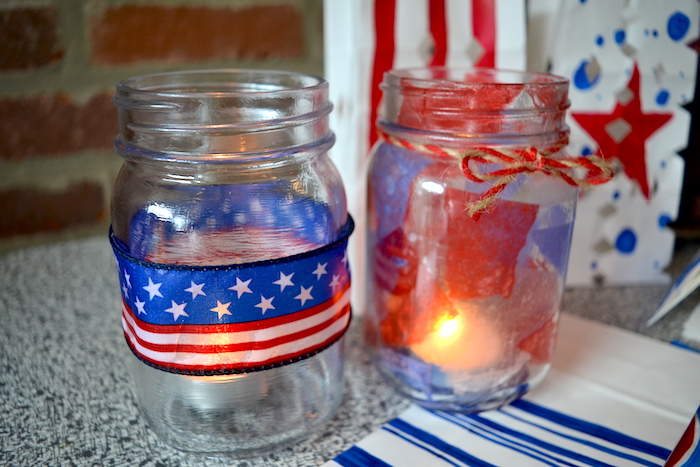
Below you’ll find the step-by-step process for making your themed mason jar candles:
What You’ll Need:
-Mason jars
-Mod Podge
-4th of July ribbon
-Tissue paper
-Scissors
-Tea light candles
-Paint brush

Step 1: Rip your tissue paper into small pieces, and cut your ribbon into 7″ length pieces.
Step 2: For the ribbon mason jar, you will want to coat the exterior of the jar with mod podge (thin layer, with brush strokes going the same direction), and stick the ribbon onto that while it’s still wet.
Step 3: Then apply a second coat over top of that ribbon and on the rest of the jar.
Step 4: For the tissue paper jar, you will want to apply a coat of the mod podge to the INTERIOR of the jar and completely cover. Then, you will stick the small pieces of tissue paper against the inside of the jar in no particular pattern.
Step 5: Apply a second coat to the interior of the jar over the tissue paper.
This will give it a stained glass effect!
Step 6: Let both jars dry, and they will dry completely clear!
Thank you again TEAM GDC! Happy 4th of July to all of the wonderful family and friends out there watching. Stay patriotic and safe this weekend!
Meg from Studio 614

