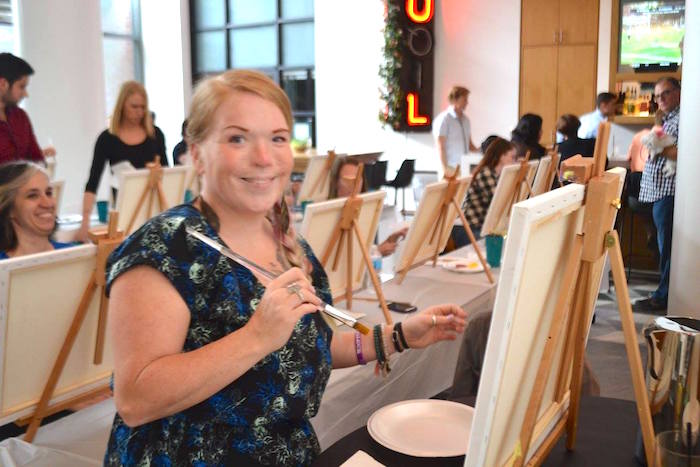
Fall Pumpkin Crafts on Good Day Columbus {Fox 28} with Megan Sharbaugh – 10/29/17
Happy Fall Ya’ll!
Having a blast again on set with the Good Day Columbus crew making these amazing fall decorations! The best part about them? You can keep them up all through November and Thanksgiving too! They’re not just Halloween pumpkins. They’re way better. Watch the full news segment here.
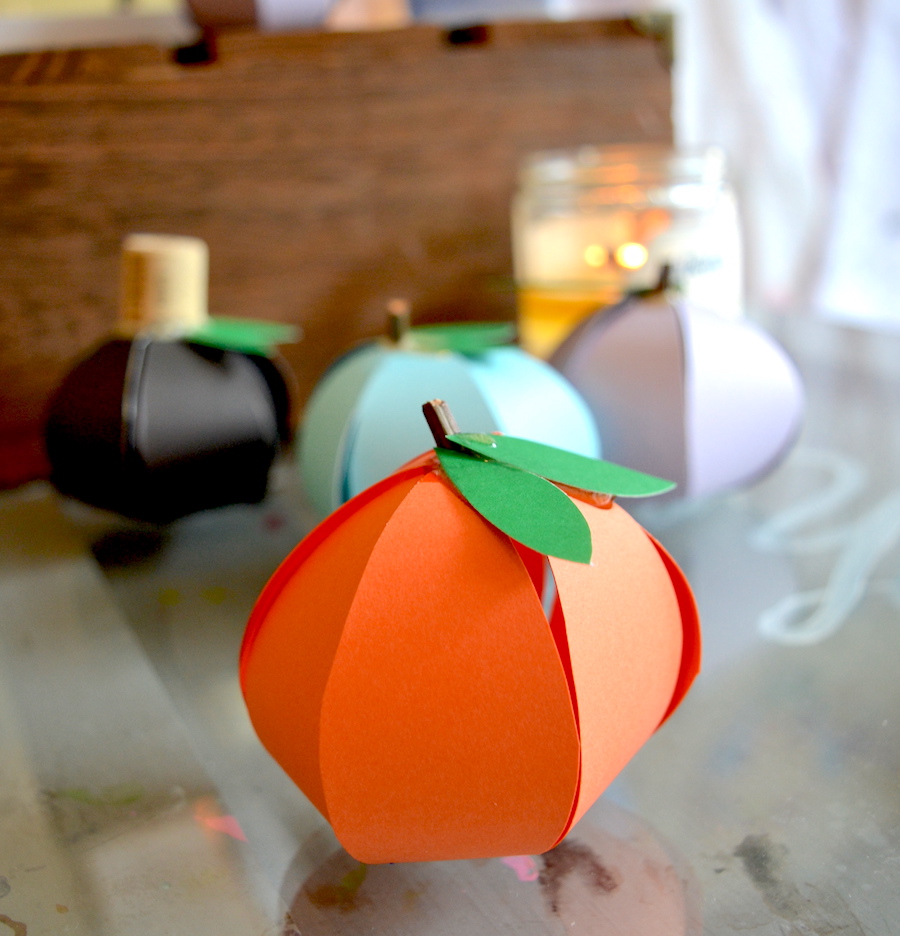
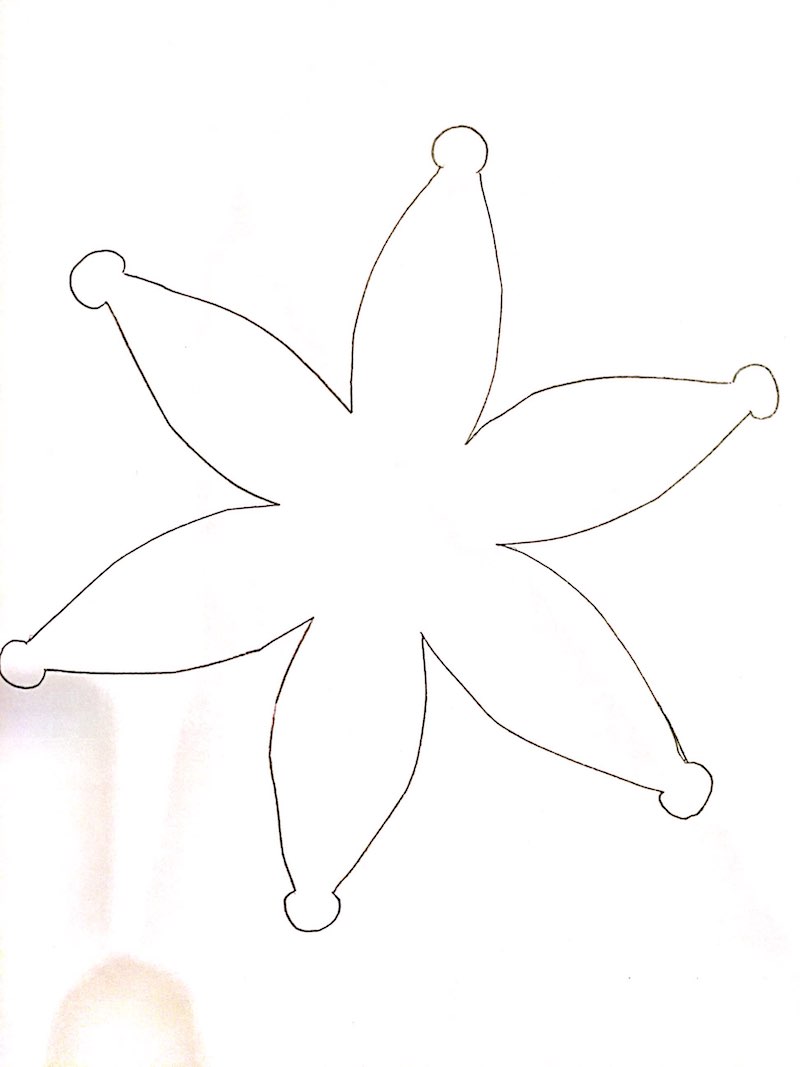
Miniature Paper Pumpkins
Supplies: construction paper for the bodies of the pumpkins (of any color), green construction paper, sticks (for the stems), hot glue, staples and stapler, scissors, and the outlined template at the bottom of this post!
Step 1) Save the outline template at the bottom of this post to your desktop, and print it using your construction paper and your printer at home. Once that outline is printed, you may cut it out with the scissors.
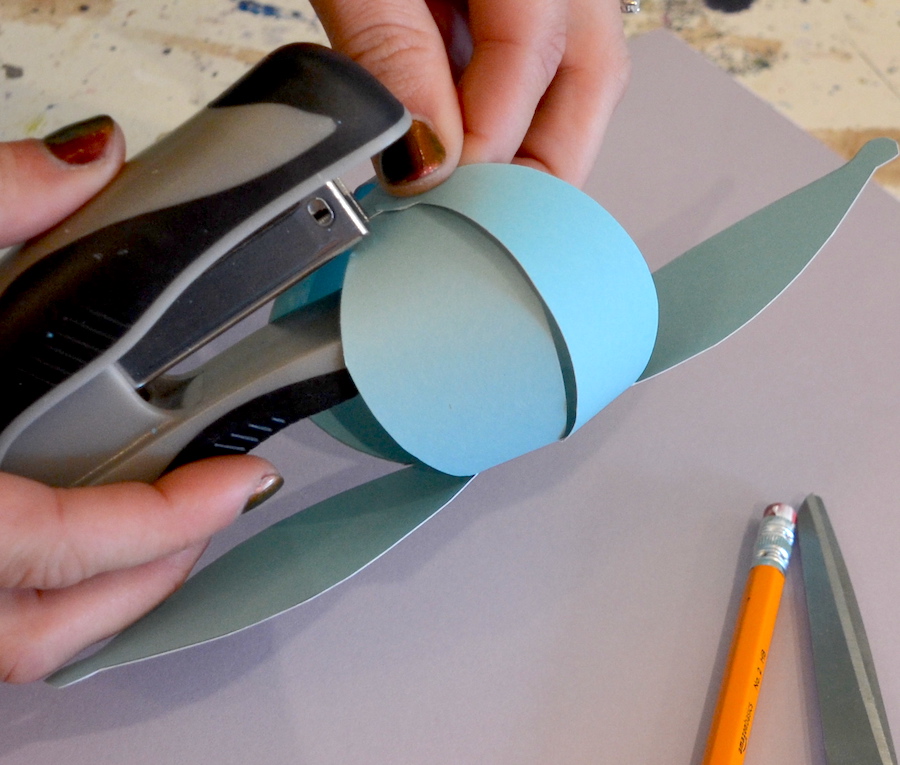
Step 2) Cut small leaves out of your green construction paper, and plug your hot glue gun in (so that it may warm up for the next few minutes).
Step 3) Bring 2 of the “flower shape outline” ends (which are OPPOSING) up together, and staple them at the top. Then, add each other flap up to the top and staple them all in place until only one flap is left still pointing horizontally.
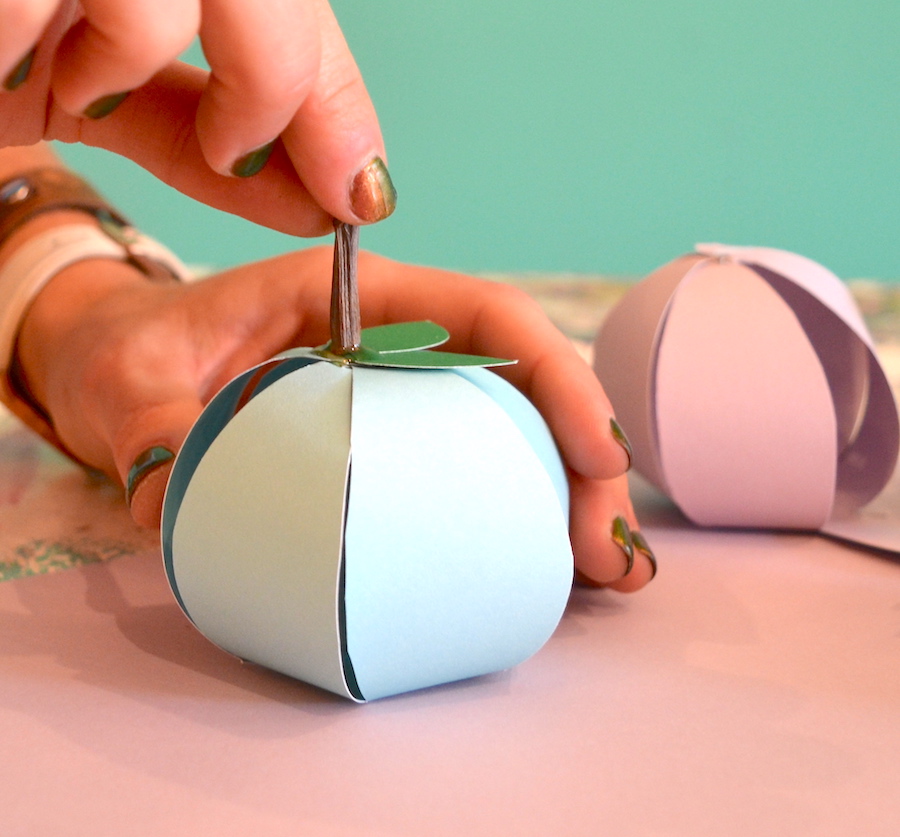
Step 4) Use the hot glue gun to add a dime size dot at the top of the pumpkin, and bring that last flap up. As you press, some of the glue should ooze out the sides, so then we will add the leaves on that glue, holding them onto the top of the pumpkin.
Step 5) Finally, you may add one tiny stick where the leaves are as well (you may add more glue around the stick if there is not enough still oozing out of the leaves and top of the pumpkin).
Step 6) Repeat for as many pumpkins as you’d like- and don’t forget there are no color rules! Make pumpkins of every color!
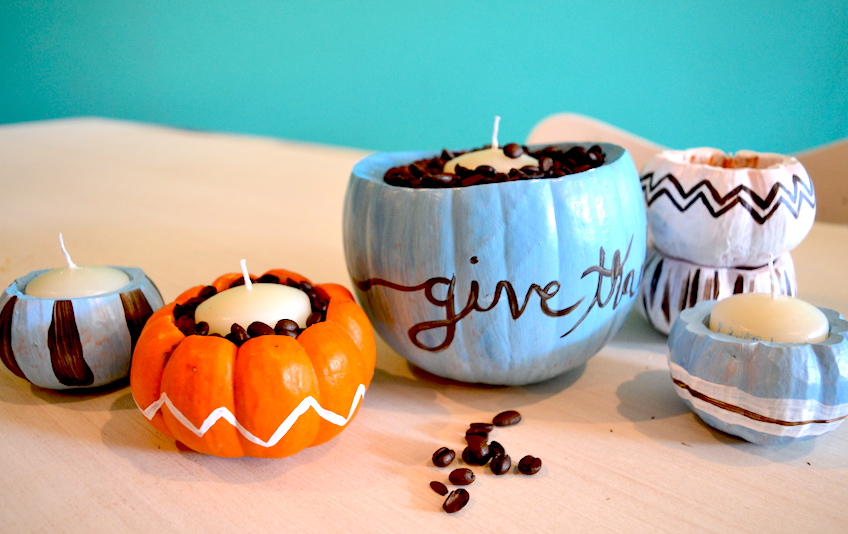
Carved Pumpkin Candle Holders
Supplies: leftover pumpkins (of any size but definitely larger than the candles you’re using), tea light or small candles, coffee beans, paint (if desired), a knife, a sharpie, and a spoon!
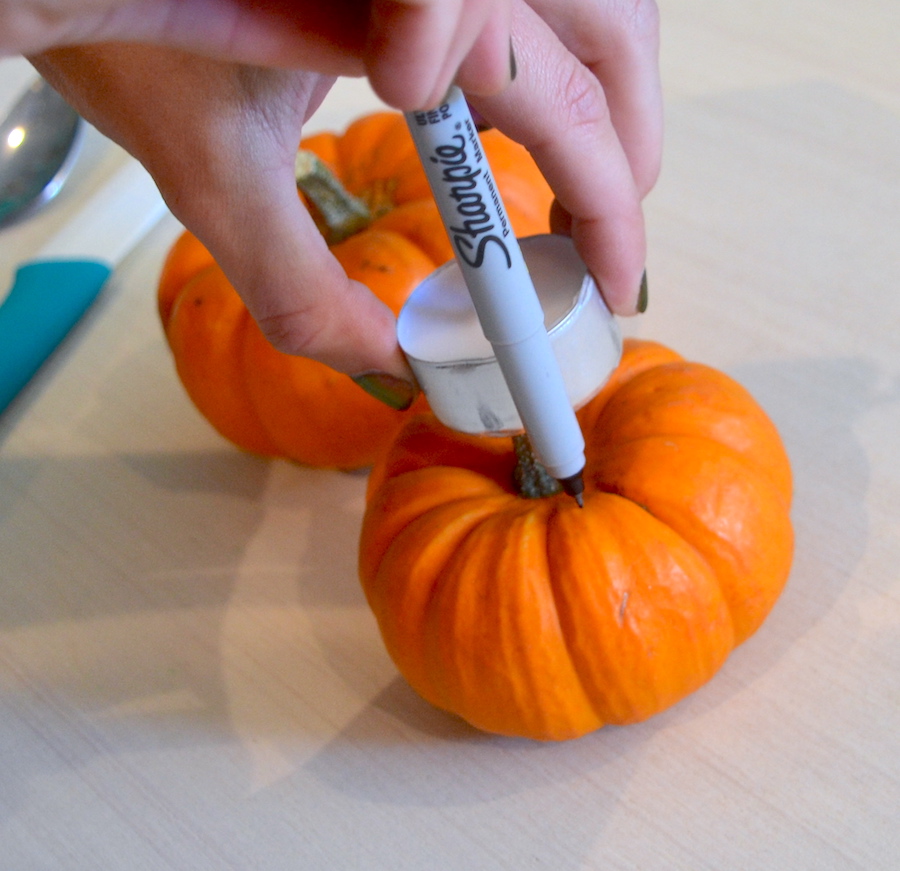
Step 1) Place the candle on the top of the pumpkin in order to use your sharpie to draw a circle around the candle marking where you will cut the pumpkin open. If you wish to add coffee beans around the candle, then make sure that this circle is somewhat larger than the candle rather than the same size.
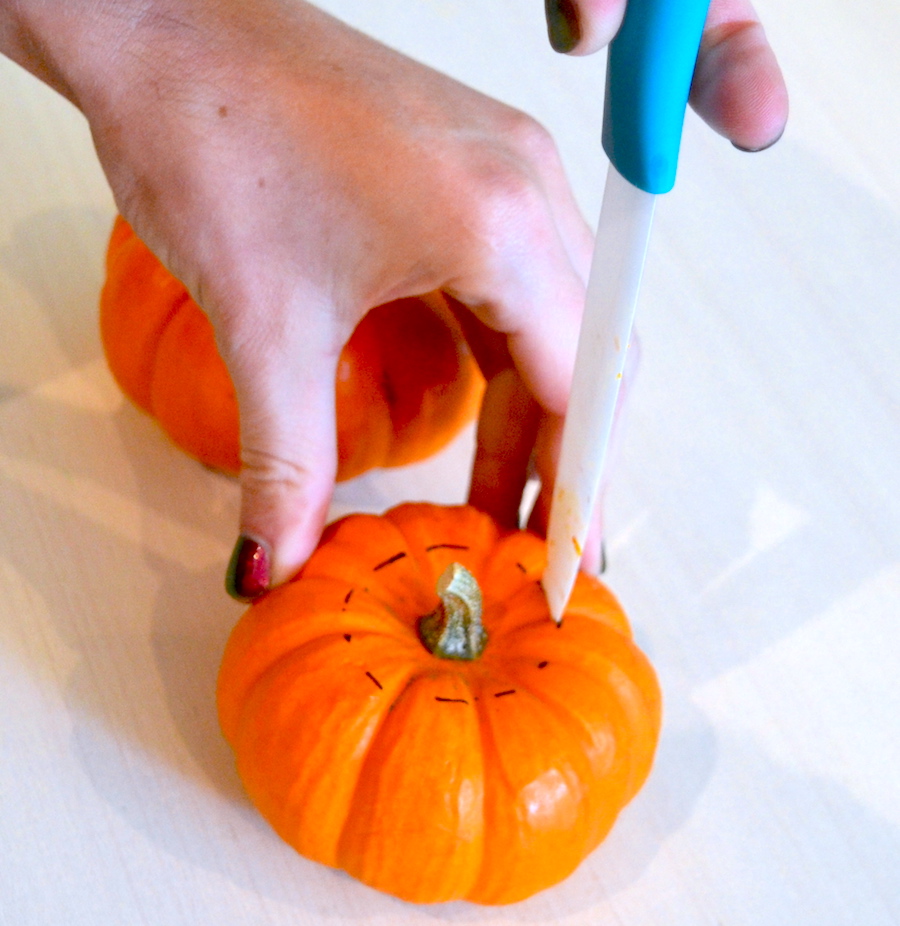
Step 2) Use your knife to begin cutting along the sharpie line. Then pry the top of the pumpkin off with the knife as well.
Step 3) Use your spoon to scoop out the insides of the pumpkin onto a paper plate or into the trash can.
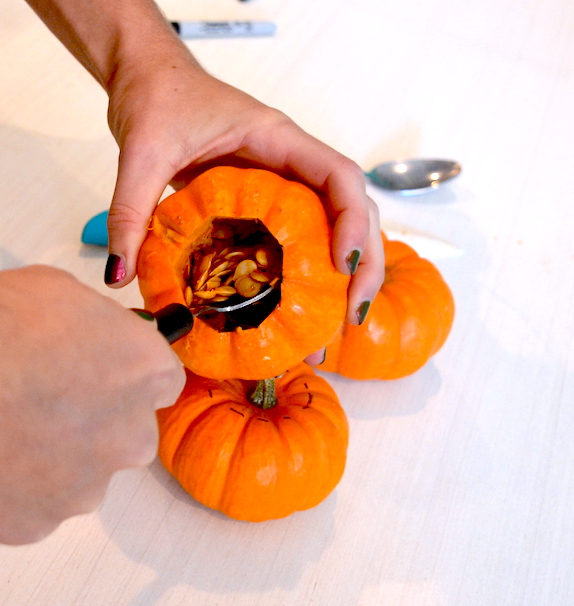
Step 4) Rinse the inside of the pumpkin, and dump some coffee beans into there (if desired).
Step 5) Finally, add a candle on top. Once lit, the warm candle will heat up the coffee beans making the room smell cozy and nice!
Step 6) *optional* Paint the outside of the pumpkin.
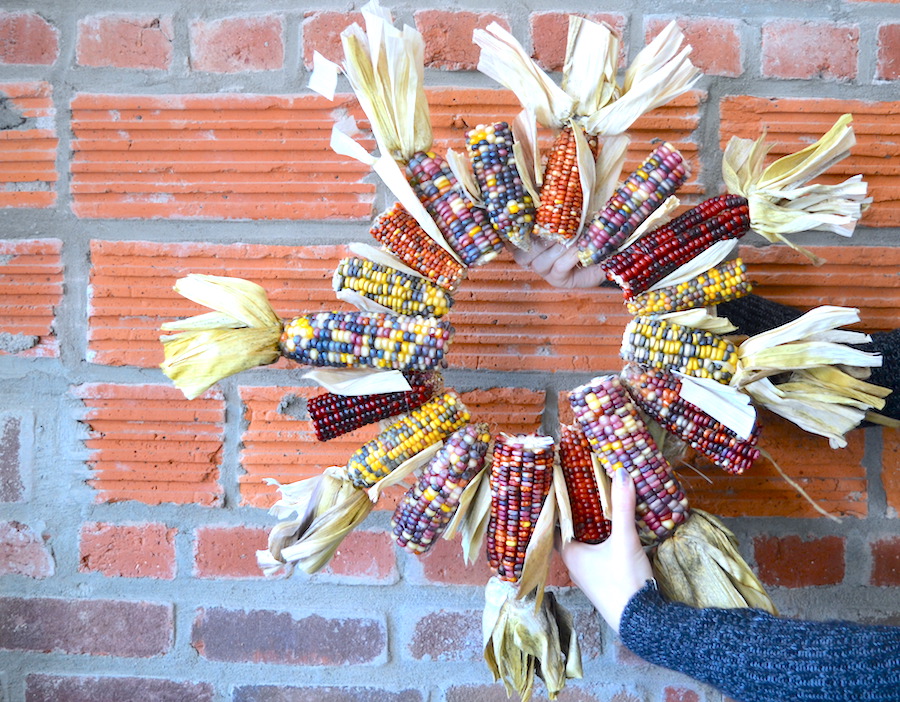
Corn Husk Wreath
Supplies: About 9 pieces of flint corn with husks still attached, scissors, knife, straw wreath form, hot glue & hot glue gun.
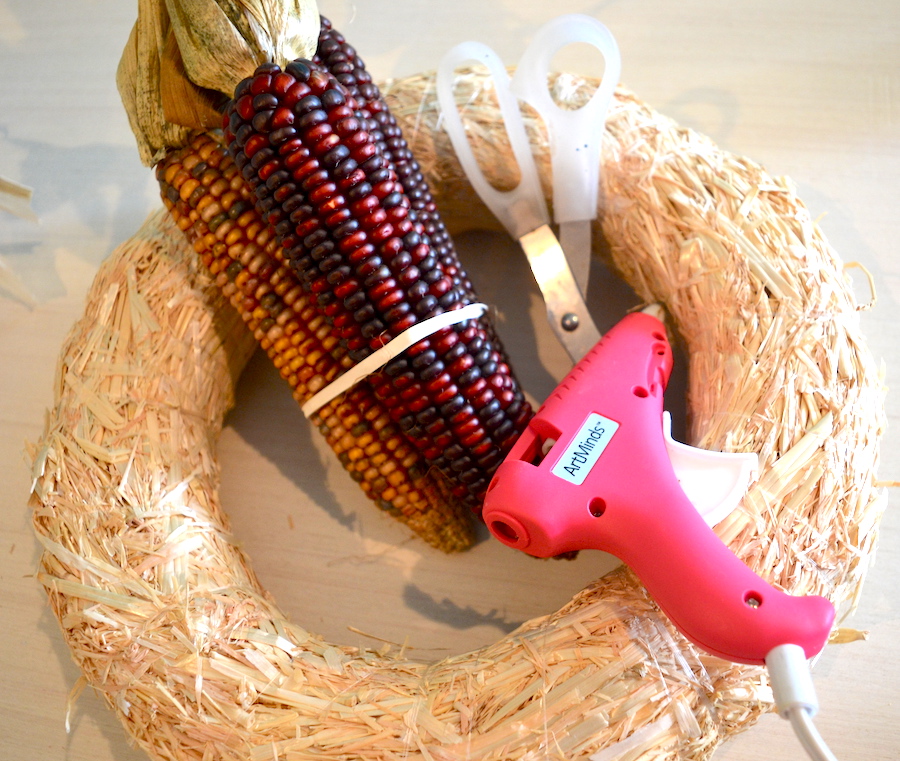
Step 1) Begin by cutting each piece of flint corn in half (hamburger style!). Since this corn is so hard, you may only cut about halfway through, and then break it apart with your hands. This worked great for me.
Step 2) Next, you’ll want to cut the husks to only be about 2 inches long from the end of the corn, since husks are usually very, very long. Save the remains that you cut off, because we may glue those onto other parts of the inside of the wreath later!
Step 3) Use the hot glue to glue one piece of corn on that still has the husk, pointing outward, and then add one piece on each side that do not have husks. Repeat that step forming a pattern so that every other piece has a husk pointing outward, just as this photo shows.
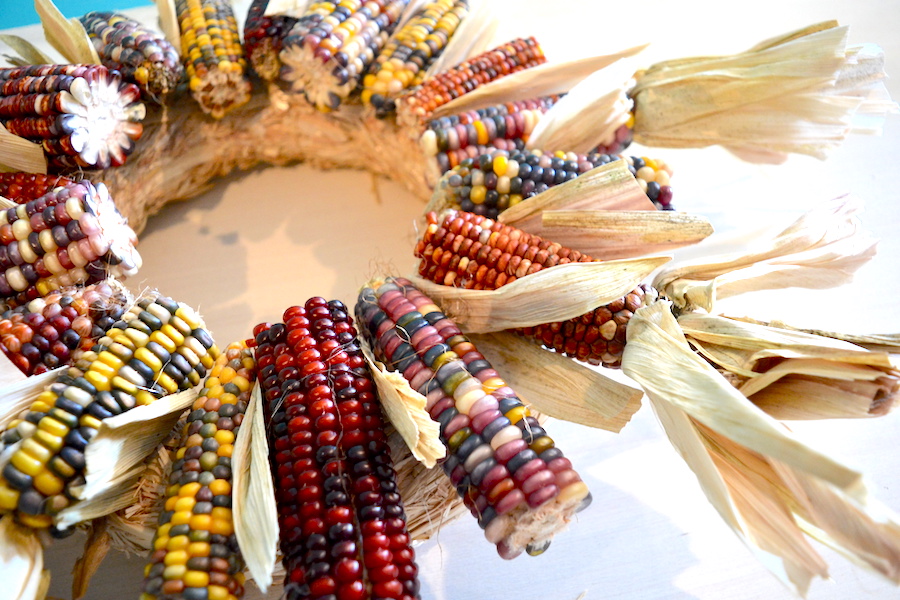
Step 4) Once the whole wreath is covered, be sure to add glue to any edges that may fe
el flimsy. We want the corn to be very solid and stuck in place.
Step 5) Now, use the husk pieces you cut off earlier to glue in between each piece of corn and wherever you may see the straw wreath form showing (or any spaces).
Step 6) Hang, and enjoy! This should stay good for many months. It may begin to form mold or mildew depending on temperature and moisture conditions, but it should not “rot” the way that cooked corn would.
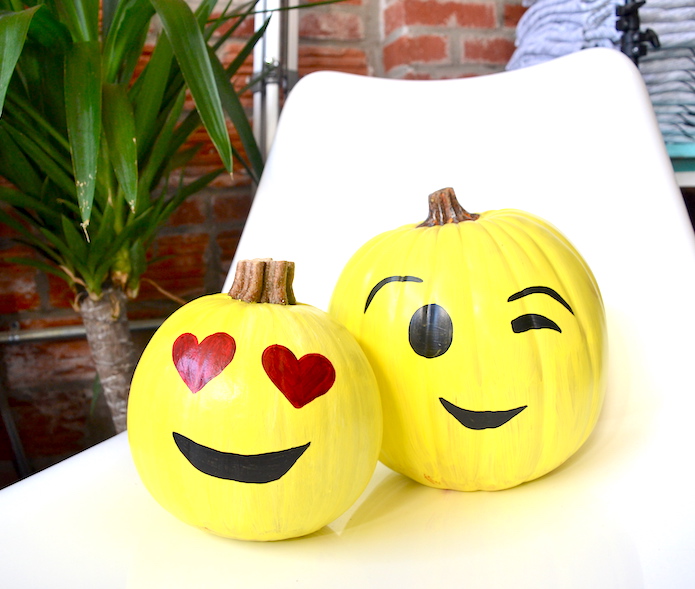
Another awesome craft to make use of your leftover pumpkins that you never carved is to paint your favorite emoji’s on them! Just Google it, and print it full-size on regular copy paper, then cut out the face to make a stencil! Tape it to your pumpkin, and get to painting.
Hope you all enjoyed these crafts, and I can’t wait to see you again on Fox 28’s Good Day Columbus!
Meg
Here’s the template for the construction paper cut-out pumpkins!


