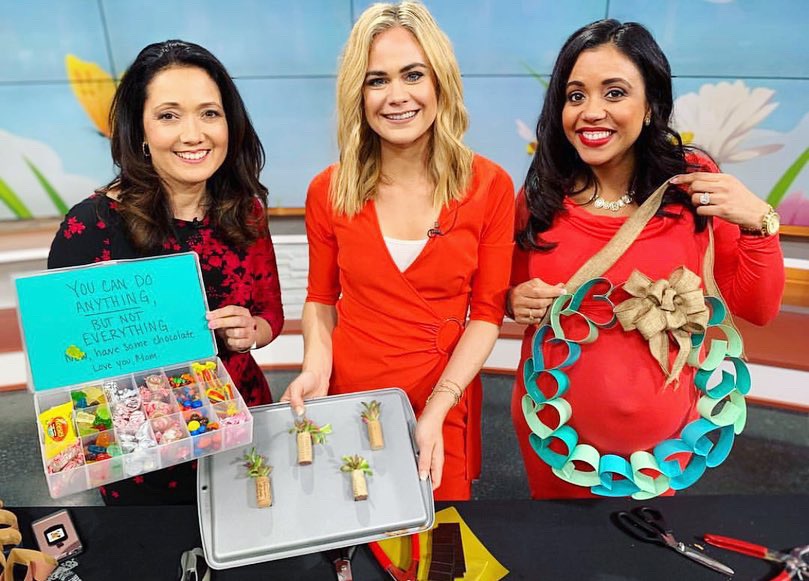
Father’s Day Crafts with Megan Sharbaugh from Studio 614 on Good Day Columbus { Fox 28 }
These crafts are just the perfect last minute DIY projects for the kids to get done before Sunday! All supplies are super inexpensive, and these are great crafts for kids of any age (with adult supervision).
Here’s the step-by-step process for creating the baseball-themed Father’s Day card:
This is for beginners, but it does require a little sewing with a needle and thread. Please be careful to supervise children under the age of 10 closely during this process. If your kids have shown any interest in sewing before, then this is the perfect first project for them! Just a few stitches, glui
ng, and drawing involved.
What You’ll Need:
-1 piece of copy paper or cardstock paper
-Red thread
-1 needle (correct size for thread)
-Size #6 hex nuts from Lowes (about 8 of them)
-Tacky glue
-Markers or paint for decorating
That’s it!
Step 1: The first step is to fold the paper in half – HAMBURGER STYLE!
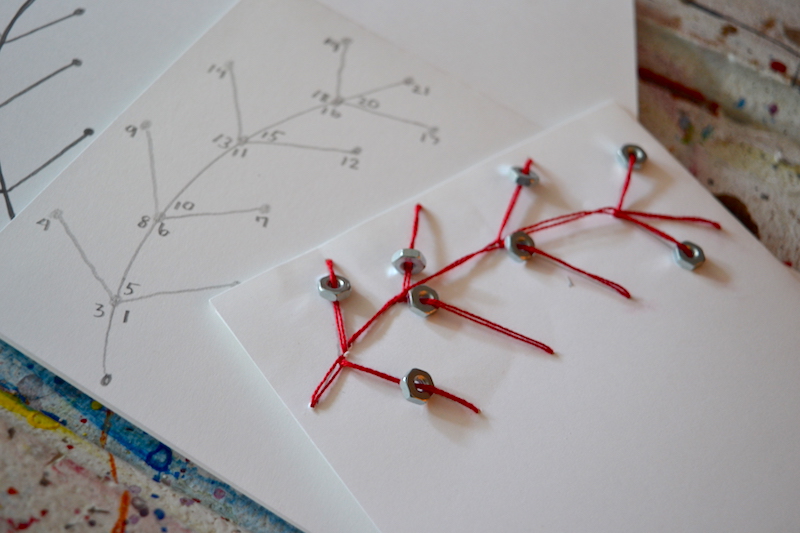
Step 2: Using the template below, begin by drawing the curved line that appears as the “stem” of the baseball stitch. Then, draw each line coming off of the stem. There should be 4 lines on each side, and they will gradually get a little smaller towards the top. Then, you can draw a dot at the end of each line, showing that that’s where the hex nuts will be. See below for reference.

Step 3: If you label the dots with the numbers below, you will more easily be able to remember where you are taking the thread next.
Step 4: Begin to thread your red string from the underside of the bottom (number 1) dot. Then thread it through about an inch up the stem. Take it to number 2 with a hex nut added to the thread, then back to 3, and then to 4 (with another hex nut added to the thread), and back to 5.
Now you see the pattern here!
step 5: IMPORTANT: When you are threading, you want to thread your hex nuts in during the correct point at each stem.
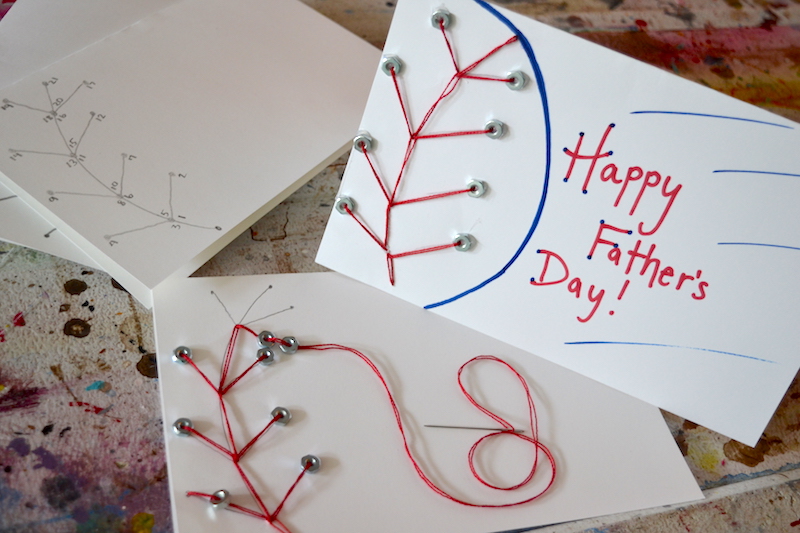
Step 6: Continue until finished, and knot it on the underside of the card.
Step 7: Now, we want to glue the hex nuts down to their proper dots using either tacky glue or a hot glue gun.
Step 8: Use markers, paint, or colored pencils to decorate, and you’ve got yourself the cutest Father’s Day card in history!
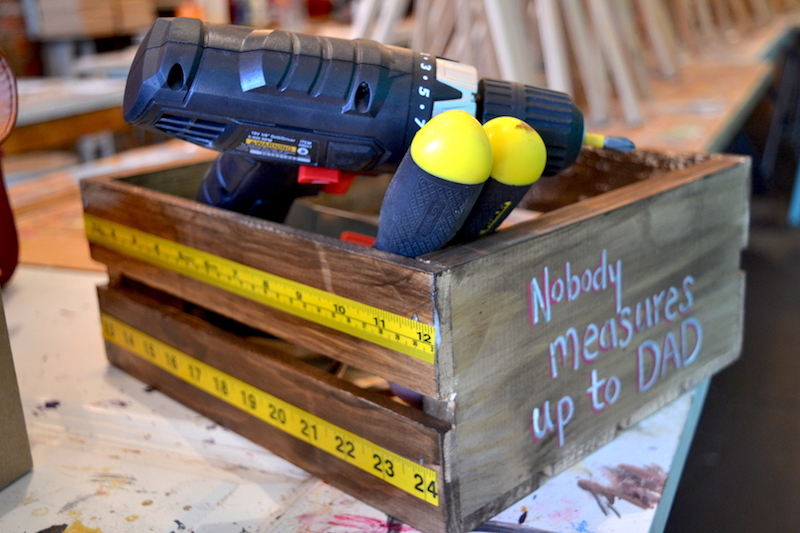
Below you’ll find the step-by-step process for making your Father’s Day tool box:
What You’ll Need:
-1 crate (either from Michaels or from the grocery store produce section)
-Brown paint (or stain)
-Water
-Paint brush
-Modge podge
-1 tape measure
-Sharpie oil paint pens
Step 1: Either paint your crate with acrylic paint or stain it. You can also finish it with polyurethane for extra protection from weathering.
Step 2: Allow that to dry completely.
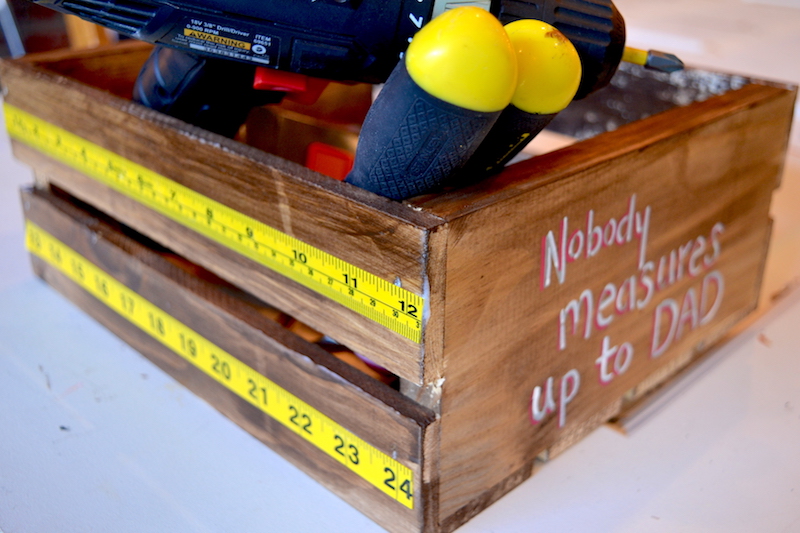
Step 3: Cut your tape measure to equal the length of the crate longways. Repeat for a second piece. And repeat for the other side of the crate as well.
Step 4: Apply modge podge with a paint brush or foam brush to the entire area that the tape measure will be attached. Then, lay the tape measure on that area and push in order to glue it in place.
Step 5: Apply modge podge to the top of this, and let dry. Then, repeat for 3-4 coats of modge podge.
Step 6: Decorate the sides with the Sharpie oil paint pens, and anywhere else desired.
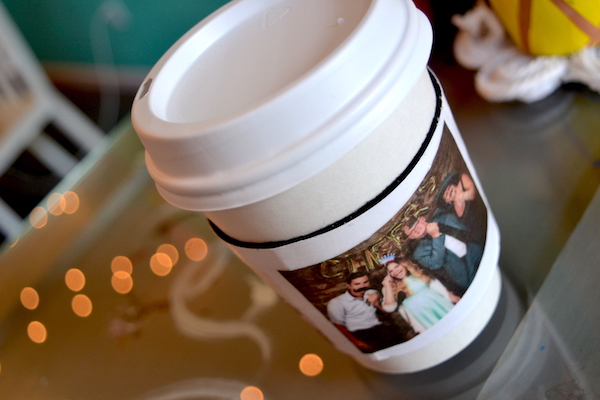
Below you’ll find the step-by-step process for making your personalized DIY coffee cup sleeve:
What You’ll Need:
-1 piece of cardstock paper (with the below template printed on it)
-1 piece of felt that matches the size of the cardstock paper
-Printed out thumbnail photos on COPY PAPER, not cardstock
-Modge podge
-Scissors
-Tacky glue
Step 1: Print the template below on your piece of cardstock paper full size.
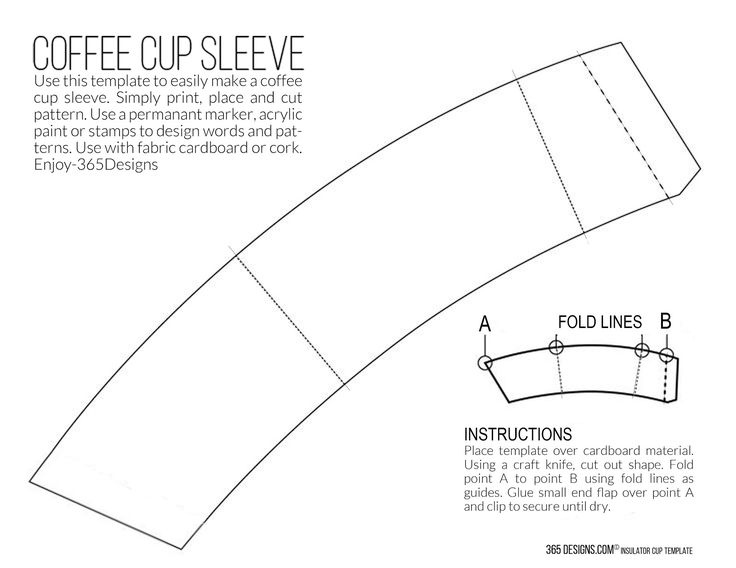
Step 2: Cut out the shape, fold to create creases along the crease lines. Then, glue it FACE DOWN to your felt piece with the tacky glue.
Step 3: After that’s dry, you will still be able to tell where the creases are. You can cut the full piece out of the felt, and notice that it’s bendy, and still has creases. This is what we want!
Step 4: Now we will apply modge podge all over the surface of the cardstock, and stick the cut out thumbnail photos on top. Then, apply another coat of modge podge over that. Let dry, and repeat for 2-3 coats of modge podge.
This will dry clear, and beautiful! Then you are ready to glue the small tab underneath the other side of the template, so that the coffee cup form will now take place.
Thank you again TEAM GDC! Happy Father’s Day to all of the dads out there. Our gratefulness to you can never be measured!
Meg from Studio 614